Classic Peanut Butter Bars: The Ultimate Sweet Treat for Every Occasion
There's something undeniably nostalgic and utterly satisfying about a perfectly crafted peanut butter bar. Whether you're planning a lively picnic, hosting an elegant garden party, or simply seeking a comforting treat for an afternoon snack, these delightful squares hit all the right notes. They embody the perfect blend of sweet, salty, and creamy, making them a universal crowd-pleaser. If you're searching for a go-to easy peanut butter bars recipe that promises both simplicity and irresistible flavor, you've come to the right place. These versatile confections are not just delicious; they're also incredibly easy to make and travel wonderfully, ensuring your sweet contribution is always a hit, wherever you go.
The Irresistible Allure of the Peanut Butter Bar
What makes peanut butter bars so universally adored? It's a combination of factors that elevate them beyond a simple dessert to a true culinary staple. First and foremost is the incredible flavor profile. Each bite delivers a rich, nutty sweetness that tantalizes the taste buds, often enhanced by the perfect partner: chocolate. This dynamic duo creates a tastebud treat reminiscent of your favorite candy bars, making them an instant hit with both kids and adults.
Beyond taste, their convenience is a major draw. These bars pack a punch of flavor into every square and require surprisingly little effort. Many variations boast minimal prep time, meaning you can whip up a batch without spending hours in the kitchen. Their robust nature also means they travel exceptionally well. Whether you're packing them into lunch boxes, toting them to a summer picnic, or delivering them to a potluck, peanut butter bars maintain their integrity and deliciousness, making them an ideal choice for any on-the-go occasion. This reliability makes them a fantastic make-ahead dessert for busy weeks or last-minute guests, ensuring you're always prepared with a delightful treat.
Baked vs. No-Bake: Which Peanut Butter Bars Recipe is Right for You?
One of the beauties of peanut butter bars is their adaptability. You can choose between a classic baked version, offering a comforting, slightly chewy texture, or a creamy, chilled no-bake delight. Each method has its unique charm and benefits, catering to different preferences and situations.
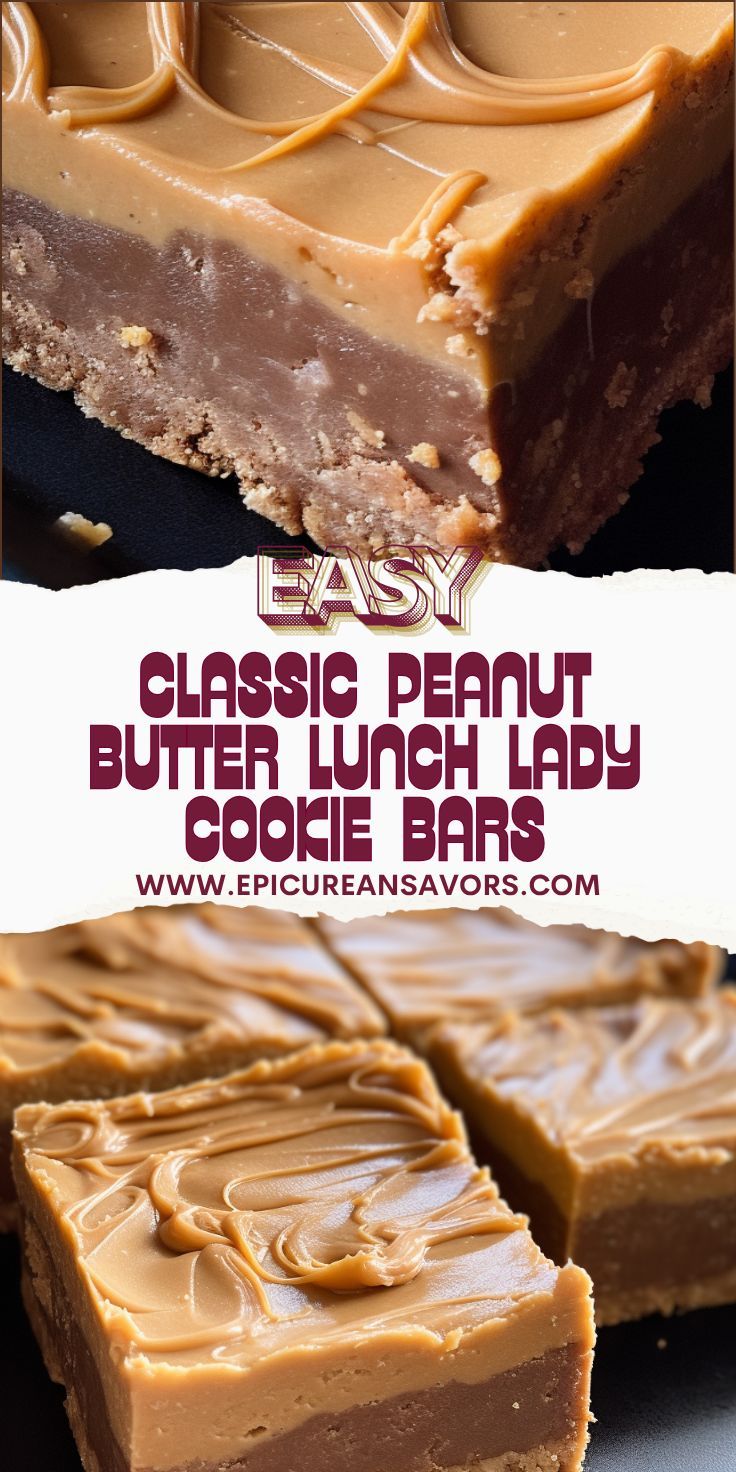
The Comforting Charm of Baked Peanut Butter Bars
For those who appreciate the warm aroma of baking and a slightly more structured treat, a baked peanut butter bars recipe is an excellent choice. These typically feature a cookie-like or cakey base that is baked to golden perfection. Prep time for these often takes as little as 10 minutes before they go into the oven, making them a surprisingly quick option for a homemade dessert.
- Convenience of Ingredients: Many baked recipes simplify the process by calling for self-rising flour, eliminating the need to measure out additional leavening agents. If self-rising flour isn't a pantry staple for you, a simple substitute of 1-1/2 cups all-purpose flour, 1 teaspoon baking powder, and 1/2 teaspoon baking soda works perfectly.
- Topping Versatility: The peanut buttery goodness doesn't stop with the base! Baked bars are often topped with an additional layer of peanut butter chips, or you can elevate the experience by adding semi-sweet chocolate chips, creating that classic chocolate-peanut butter combination that everyone loves.
- Yield: A typical baked peanut butter bars recipe often yields a generous amount, such as 32 pieces, making it ideal for larger gatherings or ensuring you have plenty for snacking throughout the week.
The Refreshing Ease of No-Bake Peanut Butter Bars
When the weather is warm, or you simply want to keep your kitchen cool, no-bake peanut butter bars are your new best friend. These creamy, rich, and perfectly chilled treats are a total winner for busy parents, home cooks, and anyone looking for a quick, stress-free dessert. They taste remarkably like those famous store-bought chocolate peanut butter cups but with the satisfaction of being homemade.
- Speed and Simplicity: You can whip up a batch of no-bake bars in just about fifteen minutes, making them perfect for last-minute guests or when a sudden sweet craving strikes. The process is as easy as stirring and pressing – mix the base, spread the chocolate, and wait for them to chill.
- Minimal Ingredients: Most no-bake recipes require only five simple pantry ingredients, which keeps your grocery bill low and your stress even lower. Common ingredients include graham cracker crumbs, powdered sugar, melted butter, creamy peanut butter, and semi-sweet chocolate chips.
- Kid-Friendly Project: With no oven involved and straightforward steps, making no-bake peanut butter bars is a fantastic project for little kitchen helpers. Even a beginner can master this recipe today, practically guaranteeing success.
- Perfect for Summer: There's nothing better than a cold treat on a sunny day, and these bars deliver. They are ideal for easy summer entertaining, block parties, or family picnics, traveling well in a cooler with ice.
Crafting Your Perfect Peanut Butter Bars: A Guide
Regardless of whether you choose the baked or no-bake route, the fundamental principles of a great peanut butter bars recipe remain consistent: a delicious peanut butter base and an equally enticing topping. Here's a general guide to help you create your ideal batch:
The Base: Foundation of Flavor
For baked bars, the base typically involves combining flour (self-rising or a mix of all-purpose, baking powder, and baking soda), sugar, butter, and, of course, creamy peanut butter. This mixture forms a delightful, slightly crumbly yet firm layer when pressed into a pan and baked. The key is to press it firmly and evenly to ensure a consistent texture.
For no-bake bars, the base is often a delightful mix of crushed graham cracker crumbs, powdered sugar, melted unsalted butter, and creamy peanut butter. This combination creates a rich, dense, and slightly chewy texture that holds together beautifully once chilled. Again, firm and even pressing into a parchment-lined pan is crucial for a clean slice.
The Topping: The Grand Finale
This is where you can truly customize your peanut butter bars. The classic choice is a decadent layer of melted chocolate combined with a bit more peanut butter. This creates a smooth, spreadable ganache-like topping that sets up beautifully and offers that beloved chocolate-peanut butter synergy. Simply melt semi-sweet chocolate chips with a portion of creamy peanut butter in a microwave-safe bowl, stirring until smooth, then pour over your prepared base.
Beyond the classic, consider these delightful twists:
- All Peanut Butter: A simple spread of melted peanut butter chips provides an extra layer of nutty goodness.
- White Chocolate: For a different flavor profile, swap semi-sweet chocolate for white chocolate chips.
- Sprinkles or Candies: Add a festive touch with colorful sprinkles, mini M&M's, or crushed candy pieces over the unset chocolate topping.
- Sea Salt Flakes: A light sprinkle of flaky sea salt on top of the chocolate layer enhances the flavors and adds a gourmet touch.
- Crushed Pretzels: For an interesting texture and salty crunch, lightly crush pretzels and sprinkle them over the chocolate.
Tips for Success & Smart Storage
To ensure your peanut butter bars are nothing short of perfection, keep these practical tips in mind:
- Parchment Paper is Your Friend: Always line your baking pan with parchment paper, leaving an overhang on two sides. This makes lifting the set bars out of the pan incredibly easy, allowing for clean slicing without damaging the edges.
- Don't Rush the Chill: Especially for no-bake bars, adequate chilling time is critical. Refrigerate the pan for at least 2 hours, or until the chocolate topping is firm and the base is fully set. Rushing this step will result in messy, crumbly bars.
- Sharp Knife for Clean Cuts: Once chilled, use a sharp knife to slice the bars into uniform squares. Warming the knife slightly under hot water and wiping it clean between cuts can result in even cleaner edges for your slices.
- Travel Smart: Baked bars can travel well in an airtight container at room temperature for short periods. For no-bake bars, always transport them in a cooler with ice to maintain their firm, chilled state, especially on a warm day. Your friends will definitely ask for the peanut butter bars recipe!
- Storage for Freshness: Store any leftover peanut butter bars in an airtight container in the fridge. They will stay fresh and delicious for up to one week.
- Freezing for Future Treats: Peanut butter bars are excellent for freezing. Wrap individual bars tightly in plastic wrap or place them in a freezer-safe bag or container. They can be frozen for several months. Just thaw them for a few minutes at room temperature before eating for a quick, future treat.
Conclusion
Whether you opt for the comforting classic of a baked bar or the refreshing ease of a no-bake creation, a good peanut butter bars recipe is a culinary superpower. These sweet treats are not only simple to prepare and budget-friendly, but they also offer incredible versatility for any occasion, from casual family snacks to elegant party desserts. Their travel-friendly nature and universal appeal make them an ideal choice for picnics, potlucks, and celebrations of all kinds. So, next time you're in search of a foolproof dessert that promises to delight, pull out your ingredients and whip up a batch of these timeless classics. You'll understand why these sweet, peanut buttery squares disappear fast at any gathering!
